10 Budget-Friendly DIY Projects to Transform Your Backyard into an Oasis


Is Your Backyard in Need of a Makeover, But Your Budget is Limited?
Have you ever found yourself looking out the window at your backyard and feeling that twinge of frustration? That space that should be your outdoor sanctuary has become a constant reminder of unfinished projects and postponed dreams? You’re not alone. Many homeowners feel intimidated by the idea of transforming their backyards, especially when professional landscaping project budgets easily exceed thousands of dollars.
The good news is that creating a stunning and functional backyard doesn’t have to drain your bank account. With a few strategically chosen DIY backyard projects, basic tools, and a bit of creativity, you can completely transform your outdoor space for a fraction of the cost of hiring professionals. As someone who has transformed three different backyards on a limited budget, I can assure you that the results not only save money but also provide an incomparable sense of accomplishment.
The real challenge lies in knowing where to start and which projects will offer the greatest visual and functional impact with the smallest investment. Many of us have purchased expensive materials for ambitious projects that never materialized, or invested time in improvements that didn’t survive the first heavy rain. But it doesn’t have to be that way. With proper planning and the right projects, your backyard can become that outdoor sanctuary you’ve always dreamed of – a place where family memories are created, where you can relax after a long day, all without the burden of debt or buyer’s remorse.
🏡 What You’ll Discover in This Guide
This comprehensive guide will walk you through ten affordable DIY backyard projects that offer maximum impact with minimum investment, perfect for transforming your outdoor space regardless of its current state.
- 🌿 Privacy Solutions: Create secluded outdoor spaces without breaking the bank
- 🔥 Fire Features: Build cozy gathering spots for evening enjoyment
- 🪑 Outdoor Living: Craft comfortable seating and dining areas from inexpensive materials
- 🌻 Garden Elements: Construct raised beds and planters from recycled materials
- 💰 Budget Tips: Insider secrets for sourcing materials at the lowest possible prices
- 🔨 Step-by-Step Instructions: Clear guidance for DIYers of all skill levels
Creating Privacy with DIY Screens 🌿
Nothing transforms a backyard more dramatically than creating defined, private spaces. According to a 2022 survey by the National Association of Landscape Professionals, privacy features rank among the top three most desired backyard elements – yet professional installation of fencing or mature hedges can cost thousands. Thankfully, DIY privacy screens offer an effective and budget-friendly alternative.
“The strategic placement of privacy screens not only creates intimate spaces within your yard but can actually make smaller properties feel larger by dividing them into ‘outdoor rooms’,” explains Sarah Johnson, landscape designer and author of “Small Space, Big Dreams.” “The beauty of DIY screens is their versatility—they can be moved seasonally, customized to your aesthetic, and constructed from materials that might otherwise be discarded.”
Privacy screens serve multiple functions beyond just blocking unwanted views. They can:
- Deflect noise from busy streets or neighboring properties
- Create windbreaks for delicate plants or dining areas
- Provide structural support for climbing plants
- Define separate functional zones within your yard
- Add architectural interest to flat landscapes
A recent study published in the Journal of Environmental Psychology found that even modest increases in perceived privacy in outdoor spaces correlated with significantly higher rates of outdoor time and reported well-being among homeowners. With the average American now spending over 90% of their time indoors, creating inviting, private outdoor spaces has never been more important.
Building a Simple Fire Pit for Small Backyards 🔥

Ready to add the magnetic charm of a fire feature to your backyard without calling in contractors or spending a fortune? Building your own fire pit is one of the most rewarding weekend DIY projects—offering immediate gratification and creating an instant gathering space that extends your outdoor enjoyment well into the evening hours and cooler months.
A survey by the American Society of Landscape Architects found that fire pits or fireplaces are among the most requested outdoor design elements, with 78% of respondents rating them as “very popular.” Despite this demand, many homeowners assume fire features are beyond their budget or technical abilities.
“There’s a common misconception that fire pits require expensive materials or specialized skills,” says Michael Ramirez, fire safety specialist and DIY enthusiast. “In reality, a safe, functional fire pit can be constructed in a weekend with materials costing under $100, depending on your design choices.”
How to Build a Basic Circular Fire Pit
Follow these steps to create a simple yet effective fire pit perfect for small backyards:
- Plan and prepare – Choose a location at least 10 feet from structures, overhanging trees, or flammable materials. Check local regulations regarding outdoor fires.
- Gather materials – For a basic 3-foot diameter pit, you’ll need:
- 40-50 retaining wall blocks or fire-rated bricks (approximately $1.50-$3 each)
- 1 bag of paver base ($4-6)
- 1-2 bags of pea gravel ($3-5 each)
- Measuring tape, shovel, level, and garden stakes
- Mark and excavate – Use stakes and string to mark a circle. Dig about 6 inches deep within your circle.
- Create drainage – Add a 2-inch layer of paver base, followed by 2 inches of pea gravel, and tamp down.
- Arrange blocks – Place your first layer of blocks around the circle, checking for level as you go. Add a second and third layer, staggering the joints for stability.
- Finish the interior – Add a final layer of pea gravel inside the pit to provide drainage and help manage embers.
Pro Tip: For increased stability without mortar, look for trapezoidal-shaped retaining wall blocks that naturally form a circle when arranged with the narrow ends inward. These create a sturdy structure without requiring adhesives or specialized masonry skills.
The beauty of this project is its scalability—you can start with a simple design and upgrade over time. Some budget-friendly enhancements include:
- Adding a metal fire ring insert ($30-60)
- Creating custom seating from landscape timbers
- Installing paver stones around the perimeter for a finished look
- Planting fire-resistant ornamental grasses nearby for added texture
One homeowner in Portland, Oregon, reported: “We built our fire pit for just under $85 using concrete blocks from a construction site that was giving them away. It’s nothing fancy, but it’s become the heart of our backyard. We use it at least weekly, and it’s completely changed how much time we spend outdoors.”
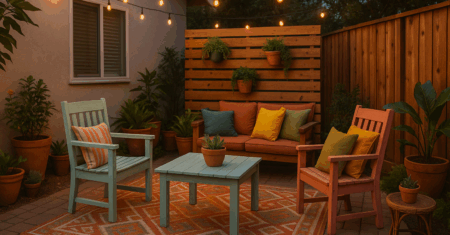
Budget-Friendly Patio Makeover Ideas 💰
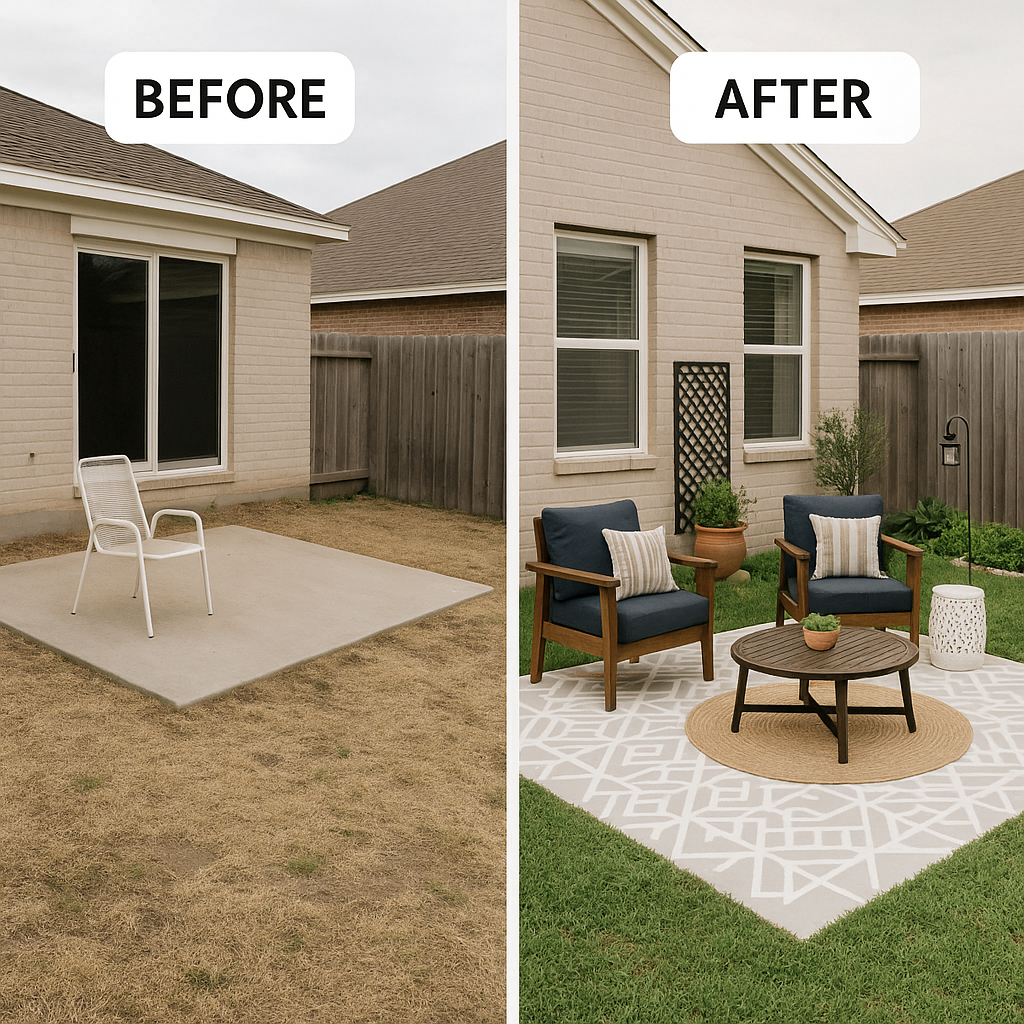
Is your existing patio looking tired, dated, or simply uninspired? You’re not alone. A 2021 Home Improvement Research Institute survey found that 62% of homeowners are dissatisfied with their current patio space, yet many delay renovations due to perceived costs. The truth is that a stunning patio makeover doesn’t require a complete demolition or premium materials—just some strategic updates that address the key elements of function, comfort, and style.
“The most dramatic patio transformations often come from a series of smaller changes rather than one major overhaul,” explains interior designer Elena Rodriguez. “By addressing surfaces, seating, shade, and styling as separate components, homeowners can spread costs over time while still enjoying improvements immediately.”
Transforming Existing Concrete Patios
If your patio’s biggest eyesore is a stained, cracked, or plain gray concrete slab, consider these budget-friendly solutions:
| Technique | Average DIY Cost | Durability | Difficulty Level |
|---|---|---|---|
| Concrete stain | $0.50-$1 per sq. ft. | 5-7 years | Beginner |
| Concrete paint | $0.80-$1.50 per sq. ft. | 3-5 years | Beginner |
| Paver overlay | $2-$5 per sq. ft. | 10+ years | Intermediate |
| Outdoor rug | $0.50-$3 per sq. ft. | 1-3 seasons | No installation |
| Deck tiles | $2-$7 per sq. ft. | 3-7 years | Beginner |
Concrete stain represents perhaps the best value in patio makeovers, offering a waterproof, fade-resistant finish that penetrates the surface rather than sitting on top where it can chip or peel. Modern water-based stains come in dozens of colors and can be applied in creative patterns using stencils or tape for custom designs.
Teresa Mayfield of Nashville transformed her 200 sq. ft. concrete patio with acid stain and a hand-drawn “tile” pattern for just $175 in materials. “Neighbors now ask who installed our ’tile patio,'” she reports. “They’re shocked when I tell them it’s the original concrete slab with stain and a clear sealer.”
Quick-Impact Styling Elements
Beyond flooring, consider these easy additions that deliver maximum visual impact with minimal investment:
- Outdoor textiles – Weather-resistant pillows, curtains, and tablecloths add color and comfort
- Container gardens – Group plants of varying heights in inexpensive containers painted to match your color scheme
- Repurposed furniture – Transform indoor cast-offs with outdoor paint or give second-hand furniture new life
- String lights – Create instant ambiance with solar-powered or plug-in string lighting (average cost: $15-$30 per strand)
- Outdoor art – Weather-resistant canvas prints, metal sculptures, or DIY mosaic projects personalize your space
According to landscape architect Thomas Chen, “The homes that achieve that ‘magazine look’ typically follow the 70/20/10 rule: 70% of the patio should be practical elements (flooring, furniture), 20% should be larger decorative elements (planters, lighting), and 10% should be small personal touches that tell your story.”
Constructing Raised Garden Beds from Pallets 🌱
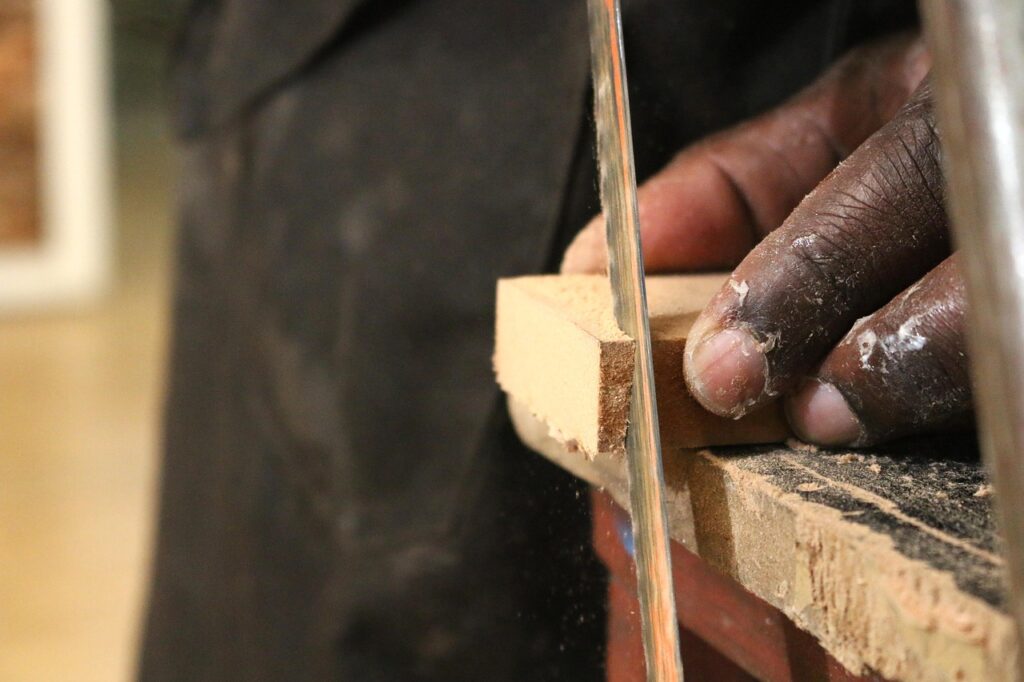
Raised garden beds solve numerous gardening challenges—poor native soil, drainage issues, accessibility concerns—but pre-made options can be surprisingly expensive. Enter the wooden pallet: a versatile, often free material that can be transformed into durable garden beds with minimal tools and woodworking experience.
According to a study by the National Gardening Association, households with raised beds produce approximately 1.4 times more vegetables per square foot than those using traditional in-ground gardens, making them not just an aesthetic choice but a practical one too. For urban gardens especially, maximizing production in limited space is essential.
“Pallets are essentially pre-fabricated garden beds waiting to happen,” notes urban farming expert Marcus Williams. “With basic tools and some careful disassembly, a single pallet can provide enough wood for a 4′ x 2′ raised bed that would cost $50-60 if purchased as a kit.”
How to Build a Basic Pallet Garden Bed
Materials needed:
- 2-3 heat-treated wooden pallets (look for “HT” stamp, avoid “MB” which indicates chemical treatment)
- Box of 1.5-inch exterior screws
- Landscape fabric (optional)
- Drill with screwdriver bit
- Hammer or pry bar
- Saw (hand saw works fine)
- Sandpaper (optional)
Step-by-step process:
- Disassemble the pallets – Carefully pry apart the pallet boards, saving both the deck boards (thin pieces) and the stringers (thicker support pieces).
- Cut to size – Measure and cut the boards to your desired dimensions. A standard 4′ x 2′ bed requires minimal cutting of pallet pieces.
- Assemble the base frame – Create a rectangular frame using the thicker stringers as your corner posts and some of the deck boards as your sides.
- Add side walls – Attach the remaining deck boards horizontally to create the sides of your raised bed. Leave about ¼-inch gap between boards for drainage.
- Reinforce corners – Add additional screws at the corners for stability.
- Sand rough edges – Smooth any splintery areas, especially along the top edge where hands will rest.
- Add landscape fabric – If desired, staple landscape fabric to the inside bottom to prevent weeds from growing up.
Safety considerations:
- Always wear gloves when handling pallets to avoid splinters
- Check pallets for protruding nails and remove them
- Only use heat-treated pallets for food gardens, never chemically treated ones
- Sand rough edges to prevent injury
Pro Tip: To extend the life of your pallet garden bed, line the inside with heavy-duty plastic (with drainage holes) or apply a non-toxic wood sealer to the exterior surfaces. This can extend the lifespan from 2-3 years to 5+ years, depending on your climate.
Michael and Kate Redmond of Phoenix documented their pallet garden project: “We built four raised beds from pallets we got free from a local appliance store. Total cost was $28 for screws and sealer. We’re growing tomatoes, peppers, and herbs—basically a complete salsa garden—in what used to be dead space along our fence.”
The versatility of pallet wood extends beyond simple rectangular beds. With the same basic materials, you can create:
- Tiered planters for strawberries or cascading flowers
- Trellised beds for climbing vegetables
- Custom-height beds for gardeners with mobility concerns
- Coordinated planter systems with built-in paths
DIY Outdoor Furniture Projects 🪑
Creating your own outdoor furniture not only saves money but allows you to customize pieces to perfectly fit your space and style preferences. With weather-resistant outdoor furniture typically costing hundreds or even thousands of dollars, the DIY approach can yield savings of 70-90% while delivering pieces uniquely suited to your needs.
“The outdoor furniture market has exploded in recent years, with prices to match,” says furniture designer Carlos Mendez. “Ironically, many high-end pieces use the same basic construction techniques that are completely accessible to DIYers. The difference is mostly in the finishing details, which anyone can learn.”
A survey of home improvement enthusiasts found that outdoor seating is the most popular DIY furniture project, followed by tables, planters, and storage solutions. Most respondents cited cost savings as their primary motivation, but customization options and environmental benefits were close behind.
Popular Outdoor Furniture Projects for Beginners
Concrete Block Bench
One of the simplest yet most effective outdoor seating solutions combines readily available materials—concrete blocks and pressure-treated lumber—into a durable, modernist bench.
Materials needed:
- 10-12 standard concrete blocks ($1.50-$2.50 each)
- 3 pressure-treated 4×4 posts, cut to desired length
- Weather-resistant cushions
- Construction adhesive (optional)
Simply arrange the blocks in two stacks with gaps to support your wooden beams. The blocks can be configured in multiple patterns, dry-stacked for temporary installations, or secured with landscape adhesive for permanence. The wooden beams are placed across the blocks, creating the seating surface.
Pallet Sectional Sofa
For larger seating needs, pallet sectionals offer impressive results with minimal materials. A basic L-shaped sectional requires:
Materials needed:
- 6-8 wooden pallets
- Weather-resistant screws
- Outdoor foam and fabric
- Drill and saw
- Sandpaper and outdoor paint/stain
The construction involves stacking pallets for the base (typically two high), adding a back support with additional pallets, sanding all surfaces smooth, and finishing with weather-resistant paint or stain. Custom cushions complete the look, though many DIYers save by repurposing standard bed pillows inside waterproof covers.
My personal experience: Last summer, I built a pallet daybed for our small courtyard using four pallets, reclaimed fence boards, and cushions I sewed from clearance outdoor fabric. The entire project cost $67, compared to similar pieces retailing for $600-800. Beyond the cost savings, the daybed perfectly fits our awkward corner space—something no store-bought piece could achieve.
Importance of Weather Protection
When building outdoor furniture, weather protection is crucial for longevity. Consider these protective measures:
- For wood: Apply exterior-grade sealer or marine varnish yearly
- For metal components: Use rust-resistant primers and paints
- For cushions: Choose quick-drying foam and water-resistant fabrics, or design with removable cushions that can be stored during inclement weather
- For all furniture: Consider storage options during extreme weather or winter months
The beauty of DIY outdoor furniture is that it can be repaired or refreshed much more easily than commercial pieces, often using the same materials and techniques from the original construction.
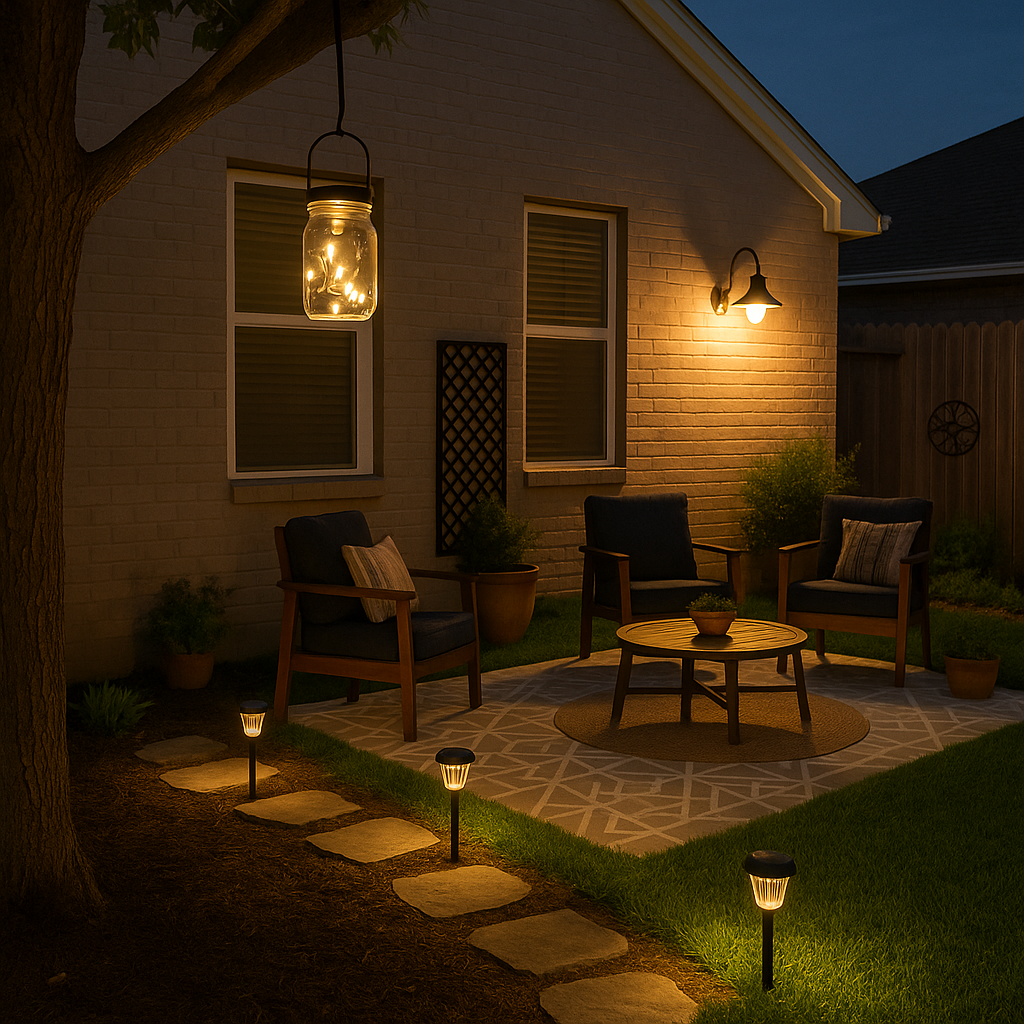
Lighting Solutions for Evening Ambiance ✨
Nothing extends the usability of your outdoor space quite like thoughtful lighting. As the sun sets, the right illumination transforms your backyard from a shadowy afterthought into a magical evening retreat. Yet many homeowners are intimidated by outdoor electrical projects or put off by the perceived expense of professional lighting installation.
“Outdoor lighting is the single most transformative element in evening landscape design, yet it’s often the most overlooked,” notes lighting designer Jennifer Akerman. “The good news is that with today’s solar and low-voltage options, creating a professional-looking lighting scheme is within reach of any DIYer.”
The outdoor lighting market offers numerous options for every skill level, from simple plug-and-play solutions to more involved installations. According to industry data, homeowners who add strategic outdoor lighting typically see a 50% increase in their evening outdoor time and report higher satisfaction with their properties overall.
Easy-to-Implement Lighting Projects
1️⃣ Solar Pathway Lights
The entry point for many DIY lighting enthusiasts, solar pathway lights require zero wiring and minimal installation—simply press them into the ground where needed.
Benefits:
- No electricity costs
- Easy to reposition seasonally
- Available in numerous decorative styles
- Most affordable entry point to outdoor lighting
Pro tip: Look for models with replaceable batteries to extend their useful life, and clean the solar panels periodically for maximum charging efficiency.
2️⃣ DIY String Light Installation
Perhaps the most popular outdoor lighting trend in recent years, string lights create instant atmosphere with minimal effort.
Materials needed:
- Outdoor-rated LED string lights
- Mounting hardware (hooks, guide wire, poles as needed)
- Outdoor-rated extension cord
- Timer or smart plug (optional)
For installation without permanent structures, consider:
- Black iron pipes set in concrete-filled planters as removable posts
- Tension wire systems that can span longer distances
- Shepherd’s hooks arranged in a pattern
3️⃣ Mason Jar Solar Lights
This popular upcycling project combines vintage charm with modern solar technology:
Materials needed:
- Mason jars with lids
- Solar pathway lights
- Weather-resistant adhesive
- Optional decorative elements (colored glass, pebbles)
Simply remove the stake from inexpensive solar lights, attach the solar component to the mason jar lid, and place the light inside. These can be arranged on tables, hung from trees, or mounted on fence posts.
4️⃣ Low-Voltage Landscape Lighting System
For those ready for a slightly more involved project, low-voltage lighting delivers professional results with reasonable DIY effort.
Materials needed:
- Low-voltage transformer (typically 12V)
- Low-voltage cable
- Assorted fixtures (path lights, uplights, spotlights)
- Cable connectors
Safety Tip: Always use a transformer specifically designed for landscape lighting, and never connect low-voltage fixtures directly to household current. While low-voltage systems are safer than 120V installations, proper connections and waterproof sealing are still essential for longevity and safety.
According to landscape lighting professional Thomas Rivera, “The most common mistake DIYers make with low-voltage systems is using too light a gauge of wire or underpowering their transformer. Always calculate your total wattage and then choose a transformer with at least 20% more capacity than you currently need to allow for future expansion.”
The environmental impact of outdoor lighting should also be considered. LED fixtures use 75-80% less energy than traditional incandescent bulbs and last 15-25 times longer. Many municipalities now have light pollution ordinances, making shielded fixtures that direct light downward not just courteous but sometimes legally required.
Water Features on a Budget 💦
Water features consistently rank among the most desired backyard elements, with 83% of homeowners in a recent survey saying they would include one if budget were no object. Yet pre-made fountains, ponds, and waterfalls often come with prohibitive price tags. Fortunately, DIY water features can deliver the same sensory benefits—the gentle sound of moving water, the reflective visual quality, the cooling effect on hot days—for a fraction of the cost.
“The psychological benefits of water in the landscape are well-documented,” explains environmental psychologist Dr. Rebecca Martinez. “Research shows that even modest water features can reduce stress hormones and increase feelings of tranquility. This explains why even simple DIY water elements have such a dramatic impact on how people perceive their outdoor spaces.”
For DIY enthusiasts, water features offer a perfect balance of creative expression and technical challenge. With basic plumbing principles and affordable materials, you can create custom water elements that would cost hundreds or thousands more if professionally installed.
Container Water Gardens
The simplest entry point into water features is the container water garden. Using watertight vessels you may already have, you can create delightful mini-ponds in an afternoon.
Materials needed:
- Watertight container (ceramic pot, galvanized tub, whiskey barrel half)
- Small submersible pump ($15-$30)
- Aquatic plants
- Decorative stones or glass
Steps:
- Position your container in the desired location before filling
- Place pump in the bottom, routing the cord discreetly
- Add decorative stones to conceal the pump and create planting pockets
- Fill with water, add plants, and plug in
For added interest, nestle smaller containers at different heights to create a gentle cascading effect between vessels. Solar-powered pumps eliminate the need for electrical access, though they typically provide less water movement than plug-in versions.
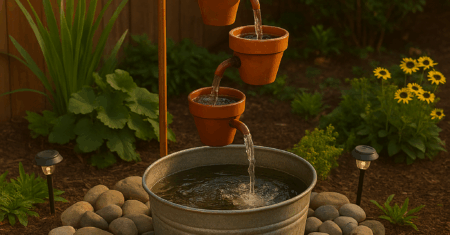
Disappearing Fountains
For those concerned about standing water (due to pets, children, or mosquitoes), disappearing fountains offer the perfect solution. These clever systems circulate water through an ornamental feature, then immediately drain it into a hidden reservoir filled with gravel.
Materials needed:
- Decorative fountain element (ceramic pot, bamboo spout, stone column)
- Preformed basin or plastic storage container
- Submersible pump with tubing
- River rocks and gravel
- Landscape fabric
A basic disappearing pot fountain can be constructed for $100-$150, compared to $500+ for comparable commercial versions. The water appears to magically emerge from the top of an ornamental vessel, then disappears as it flows over the sides into the rock-filled basin below.
DIY Waterfall Wall
For more ambitious DIYers, a waterfall wall creates dramatic impact in smaller spaces. A simple design involves:
Materials needed:
- Sheet of textured material (slate tiles, corrugated metal, tempered glass)
- Wooden frame or support structure
- Waterproof liner
- Recirculating pump with tubing
- Collection basin
| Material Choice | Visual Effect | Difficulty | Durability | Cost Range |
|---|---|---|---|---|
| Slate tiles | Natural, rustic | Medium | Excellent | $150-$300 |
| Copper sheet | Contemporary, develops patina | Medium-high | Excellent | $200-$400 |
| Glass panel | Modern, reflective | Medium | Good | $150-$250 |
| Corrugated metal | Industrial, distinctive sound | Easy | Good | $100-$200 |
A personal favorite is repurposing an old window frame with frosted plexiglass, creating a water wall that doubles as a privacy screen. The water flows down the textured surface, catching light and creating gentle white noise that masks urban sounds.
Maintenance considerations for all water features:
- Add water regularly to compensate for evaporation
- Clean pumps every 3-6 months depending on conditions
- Use algae prevention treatments as needed
- In freezing climates, either winterize or bring portable features indoors
With thoughtful design, DIY water features can actually require less maintenance than many other landscape elements while providing year-round sensory pleasure.
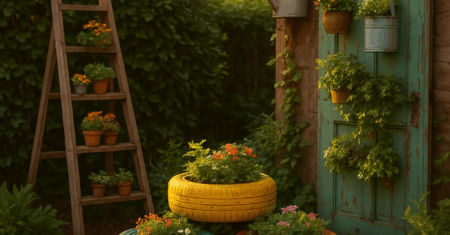
Vertical Gardening for Small Spaces 🌿
When horizontal space is limited, the smart gardener looks up! Vertical gardening techniques not only maximize your growing area but create stunning visual impact, transforming blank walls, fences, and narrow spaces into lush, productive gardens. For small backyards especially, vertical elements add crucial dimension and interest without sacrificing precious floor space.
“Vertical gardening is the single most effective strategy for small space gardeners,” says urban horticulturist Maria Chen. “A standard 8-foot fence section can support the equivalent of 32 square feet of traditional garden space—that’s like adding an entire raised bed without using any additional ground area.”
According to the National Gardening Survey, interest in vertical gardening has increased 43% in the past five years, with particularly strong growth among urban and suburban gardeners with limited outdoor space. These techniques aren’t just space-efficient; they also offer improved air circulation for plants, reduced pest problems, and easier harvesting for many crops.
🧱 DIY Living Wall Systems
Living walls—densely planted vertical surfaces—create dramatic impact but often come with intimidating price tags when purchased as systems. Creative DIYers have developed numerous budget-friendly alternatives:
- Pocket Organizer Garden
Transform a canvas shoe organizer ($10-$15) into a vertical garden by filling each pocket with potting mix and plants. Hang on a sunny fence or wall, ensuring the structure can support the weight when wet. - Pallet Living Wall
A single wooden pallet, properly prepared, becomes a striking vertical garden:
- Stand the pallet upright and staple landscape fabric to the back and bottom
- Fill horizontal spaces with potting soil
- Plant through the openings
- Allow to grow horizontally for 2-3 weeks before moving to vertical position
- Gutter Gardens
Vinyl gutters mounted on fences or walls make excellent planters for shallow-rooted crops like lettuce, strawberries, and herbs:
- Cut gutters to desired length
- Cap the ends with gutter caps
- Drill drainage holes every 8 inches
- Mount at a slight angle for drainage
- Fill with lightweight potting mix
- Bottle Tower Gardens
Particularly popular in urban communities, these towers use reclaimed plastic bottles to create vertical growing columns:
- Cut the bottom from 2-liter bottles
- Cut a planting hole in the side of each
- Thread bottles onto a central support
- Fill with soil and plant through side openings
Pro Tip: For any vertical garden, consider irrigation carefully. Hand-watering the top plants often leaves lower plants dry, while overwatering to compensate can lead to messy runoff. Simple drip irrigation systems can be created using inexpensive tubing and emitters, ensuring even moisture throughout the vertical space.
🌱 Best Plants for Vertical Gardens
Not all plants thrive in vertical conditions. Consider these proven performers:
For Edible Vertical Gardens:
- Strawberries (especially day-neutral varieties)
- Lettuce, spinach, and other leafy greens
- Herbs like thyme, oregano, and mint
- Bush beans and peas (with appropriate support)
- Compact tomato varieties labeled for containers
For Ornamental Vertical Gardens:
- Succulents (for sunny, well-drained locations)
- Ferns and moss (for shady locations)
- Trailing vines like pothos, philodendron, and sweet potato vine
- Annual flowers like petunias, calibrachoa, and lobelia
- Air plants mounted on woody structures
Lauren Pemberton, who transformed her narrow side yard using vertical techniques, shares this advice: “Start with extremely healthy plants—vertical gardens can be slightly more stressful environments until established. I also found that mixing ornamentals with edibles creates both beauty and function. My vertical herb garden near the kitchen door is both decorative and incredibly practical for cooking.”
Pathway and Border Projects 🛤️
Pathways and borders are the unsung heroes of backyard design, providing both practical function and visual structure. They guide movement, define spaces, protect plantings, and add year-round visual interest. While professional hardscaping can be prohibitively expensive, DIY pathway and border projects offer some of the best returns on investment in terms of visual impact per dollar spent.
“Pathways and borders are essentially the ‘bones’ of your garden design,” explains landscape designer Thomas Wilson. “They create the framework that supports everything else. Even when plants are dormant or between blooming cycles, well-designed pathways and borders maintain the garden’s structure and appeal.”
A HomeAdvisor survey found that professionally installed garden paths average $12-$30 per square foot, while borders run $15-$60 per linear foot, depending on materials. DIY alternatives typically cost 30-60% less, making them accessible for most homeowners.
🪨 Budget-Friendly Pathway Materials
1. Mulch Paths
The most affordable path option utilizes materials you might already purchase for other garden tasks:
- Wood chips or bark mulch ($3-$6 per bag)
- Landscape fabric for weed suppression
- Edging material to contain the mulch
Simply clear and level your path area, lay landscape fabric, add 2-3 inches of mulch, and edge as desired. While requiring periodic refreshing (typically annually), mulch paths offer excellent drainage and a natural aesthetic.
2. Stepping Stone Paths
Create visual rhythm with individual stepping stones:
- Concrete pavers ($2-$5 each)
- Repurposed materials (salvaged stone, tree rounds)
- DIY cast concrete stones using molds ($10-$15 for mold)
Place stones 24-26 inches apart measured from center to center, which accommodates a natural stride. Set each stone on a base of sand or gravel and check for stability before moving to the next.
3. Gravel and Crusher Dust
For a more permanent but still inexpensive option:
- Crusher dust/decomposed granite ($40-$60 per cubic yard)
- Path edging material
- Landscape fabric
When properly installed with fabric underneath and solid edging, these materials create firm, weed-resistant paths that last for years with minimal maintenance.
4. Repurposed Materials
Creative DIYers find pathway materials in unexpected places:
- Broken concrete (“urbanite”) from demolition projects
- Used brick from architectural salvage
- Wine bottles buried neck-down as edging
- Reclaimed timber for rustic steps
🔨 Personal project highlight: For my own narrow side yard path, I collected broken concrete from a neighbor’s driveway replacement, arranged the pieces puzzle-style, and filled the gaps with thyme plants. The zero-cost path material combined with $20 worth of ground cover created a permeable, fragrant pathway that’s now one of the most complimented features of our garden.
🌷 Border and Edging Ideas
Effective borders define spaces, prevent grass encroachment, and provide visual separation between garden elements. Budget-friendly options include:
1. Trench Edging
The most affordable option requires only a flat-blade spade. Create a clean, 5-6 inch deep V-shaped trench around beds or along pathways. This classic English technique costs nothing but time and requires periodic maintenance to maintain the edge.
2. Repurposed Material Edging
Look around your home or search marketplace listings for:
- Used bricks laid vertically or at an angle
- Wine or beer bottles buried neck-down
- Fallen tree branches cut to similar lengths
- Clam or mussel shells from seafood meals
3. Purchased Edging Options (Budget-Friendly)
- Pound-in plastic edging ($15-$25 per 20 ft)
- Woven willow hurdles ($20-$40 per section)
- Rolled bamboo ($15-$30 per roll)
- Concrete garden edgers ($1-$3 each)
Safety Tip: When installing any type of border or edging, always call your local utility marking service before digging. This free service marks underground utilities and helps prevent potentially dangerous and costly accidents.
According to Daniel Roberts, garden designer and author: “The most successful garden borders offer contrast—either in material, color, or height—from both the path and the plants they’re separating. This creates visual definition that helps the eye understand the garden’s organization, even if your style is naturally wild and informal.”
Weekend Pergola and Shade Structures 🏡
Shade structures transform how we experience outdoor spaces, extending usable hours during hot weather and creating architectural features that define “outdoor rooms.” While professional pergola installations often start at $3,000-$5,000, determined DIYers can build impressive structures for a fraction of this cost.
“The pergola has exploded in popularity because it perfectly balances the desire for shelter with the connection to sky and surroundings,” observes architectural designer Karen Mitchell. “Unlike a solid roof structure, pergolas filter light and create beautiful shadow patterns that change throughout the day.”
According to the Outdoor Living Association, homes with dedicated shade structures see 45% more outdoor usage during summer months compared to those without. The psychological benefit of having a defined outdoor room also encourages homeowners to invest more in outdoor furnishings and spend more time outside.
🏗️ Simple Weekend Pergola Project
A basic 8’x10′ post-and-beam pergola can be constructed in a weekend by two people with basic tools. While design options are endless, this straightforward approach yields impressive results:
Materials needed:
- 6 pressure-treated 4×4 posts (or 4 posts for an attached structure)
- 3 pressure-treated 2×8 beams
- 8 pressure-treated 2×6 rafters
- Appropriate hardware (joist hangers, bolts, lag screws)
- Concrete for footings
- Paint or stain
Basic construction sequence:
- Layout and install post footings
- Set and plumb posts
- Attach main support beams to posts
- Install rafters perpendicular to beams
- Add decorative end cuts if desired
- Apply finishing treatment
Total material cost typically ranges from $300-$600 depending on lumber prices and size, representing savings of 80-90% compared to professional installation.
Alternative Shade Structure Ideas
For those seeking even simpler projects, consider these alternatives:
- Sail Shade Installation
Pre-made shade sails ($30-$100) can be mounted to existing structures, trees, or purpose-installed posts to create dramatic shade patterns with minimal construction. - Hoop House Structures
Using PVC pipe bent into arches and covered with shade cloth, these create tunnel-like spaces perfect for shading seating areas or garden beds. - Repurposed Door/Window Pergola
Salvaged doors and windows can be reimagined as pergola roofs, creating unique structures with architectural character and filtered shade. - Living Shade Structure
Fast-growing annual vines like morning glory, moonflower, or hyacinth bean can create seasonal shade on simple structures of string, wire, or lightweight wood.
Pro Tip: Design your pergola with future enhancements in mind. Electrical conduit can be run through posts during construction for future lighting; sturdy beams may later support fans or heaters; and strategic design can accommodate future addition of retractable canopies or privacy screens.
“Start with a simple structure, then enhance it seasonally,” suggests garden designer Elena Ramirez. “Many of my clients begin with a basic pergola, then add shade cloth in summer, string lights in fall, and perhaps clear plastic or outdoor curtains for winter use. This spreading of costs makes even ambitious projects affordable.”
The psychological impact of a defined outdoor “ceiling” shouldn’t be underestimated. Research in environmental psychology shows that humans feel most comfortable in outdoor spaces with a balance of enclosure and openness—exactly what pergolas provide. By creating this balance, even a simple DIY structure can dramatically increase how often and how long family members choose to spend time outdoors.
Frequently Asked Questions about DIY Backyard Projects ❓
🔨 What tools are essential for DIY backyard projects?
For most projects in this guide, you’ll need basic tools including a drill/driver, circular saw, tape measure, level, shovel, and wheelbarrow. While specialized tools can be helpful, many can be rented for one-time use from hardware stores. Start with quality versions of basics you’ll use repeatedly, then add specialized tools as needed. For occasional needs, tool-sharing programs and neighborhood borrowing can save significant money.
🌧️ How can I make my DIY projects weather-resistant?
Weather-resistance starts with material selection. Choose pressure-treated lumber for ground contact, cedar or redwood for visible structures, and galvanized/stainless hardware throughout. Apply appropriate sealers annually to wooden elements, use exterior-grade fabrics for cushions, and design with proper drainage in mind. In freeze-prone areas, consider how materials will respond to freeze-thaw cycles, and create appropriate winter storage for sensitive items.
💰 What are the best sources for free or low-cost materials?
Get creative with sourcing! Check online marketplace listings, especially during moving season when people often give away materials. Contact local construction sites about excess materials, visit ReStore (Habitat for Humanity’s building supply stores), join your local Buy Nothing group, and watch for neighborhood renovations that might yield salvageable materials. Many projects can utilize fallen trees, pruned branches, or stones found on your own property.
⏱️ How do I estimate the time needed for DIY backyard projects?
A good rule of thumb for beginners: estimate your time, then double it. Account for shopping, preparation, actual construction, cleanup, and refinements. Breaking larger projects into phases often yields better results than rushing to complete everything in one weekend. Many successful DIYers work in 2-3 hour sessions rather than marathon days, allowing for problem-solving time between work periods.
🏘️ Do I need permits for DIY backyard projects?
Permit requirements vary widely by location. Generally, structures under a certain size (often 100-200 square feet), projects that don’t involve electrical/plumbing changes, and landscaping changes don’t require permits. However, fences, large decks, electrical installations, and drainage modifications often do. Check with your local building department, and remember that homeowners’ associations may have additional restrictions beyond municipal codes.
🌱 How can I make my backyard projects more environmentally friendly?
Prioritize reclaimed and locally sourced materials to reduce transportation impacts. Design water features and irrigation to conserve water through recirculation and efficient delivery. Choose native plants that support local wildlife and require less maintenance. Consider permeable surfaces that allow water infiltration rather than runoff. Avoid chemical treatments where possible, and incorporate composting into your garden management.
👪 Which projects are best with children or as family activities?
The most family-friendly projects have visible results the same day and include roles for various skill levels. Great options include stepping stone pathways (children can decorate cement pavers), simple container water gardens, birdhouses or bug hotels, and planting projects. For safety, pre-cut materials for young helpers, save power tool work for adults, and choose non-toxic materials and finishes when children are involved in construction or decoration.
🛠️ How can I avoid common DIY mistakes?
First, thoroughly research before beginning—watching multiple tutorials helps identify consistent techniques versus individual preferences. Measure twice (or three times) before cutting. Purchase slightly more materials than your estimate to account for errors or damage. Start with proper site preparation—many project failures stem from inadequate foundations or drainage. Finally, don’t rush finishing details, as these often determine whether a project looks professional or obviously homemade.
Get Started on Your Backyard Transformation Today!

The journey to a transformed backyard doesn’t have to begin with a huge budget or professional expertise—just the willingness to try something new and the patience to learn as you go. As you’ve seen throughout this guide, even modest projects can dramatically improve both the function and beauty of your outdoor space.
“The most successful backyard transformations I’ve witnessed weren’t the result of one massive project, but rather a series of thoughtful improvements over time,” shares landscape designer Maria Rodriguez. “The homeowners who create truly special outdoor spaces are those who observe how they naturally use their yards, then enhance those patterns with intentional projects.”
Phase Your Transformation for Success
Consider approaching your backyard transformation in these strategic phases:
- Foundation Phase – Address any drainage issues, establish basic pathways, and create boundary definitions
- Gathering Spaces – Build seating areas, dining spaces, or fire features that encourage outdoor time
- Planting & Softscaping – Add plants for beauty, privacy, and habitat value
- Finishing Touches – Install lighting, water features, and decorative elements that personalize the space
The McKinley family of Colorado took this phased approach with impressive results: “We started with just a flat, weedy backyard and a modest budget. Over two summers, we built a simple stone patio, added a DIY pergola, created raised beds from reclaimed lumber, and installed solar lighting. The total investment was under $1,200, but we’ve essentially added another ‘room’ to our home that we use at least three seasons of the year.”
Related Articles

About the Author

0 Comments